Officer's Resources
Note 1: Anyone can access this page if they have the link so don't put anything too important here.
Note 2: If the pictures are too small, try clicking on them
Note 3: Making the website uses DreamWeaver, which should be on any UW computer
Note 4: Link to Google Analytics, to see statitics for our website if you were curious
Note 5: Don't hesitate to contact me or your current webmaster if you have further questions.
G'Luck! ~Duy H.
Table of Contents:
- Where are your files located?
- Importing the website to your local computer
- Syncing in DreamWeaver
- Dreamweaver Interface
- Opening and editing webpages
- Previewing website
- Headings
- Links
- Images + Documents
- Updating the 'Upcoming Events' column
- Updating the 'Calendar of Events' page
1. Where are your files located?
You will be working locally (on a computer for example) and then uploading your work to UW's FTP servers. Each time you work on the website locally, you will synchronize, so the files online are the same too. To see the files on UW's FTP servers, use this free program, FileZilla.
*FileZilla is not necessary to work on the website. Do use it though if you just want to retrieve/put files on the server without using having to use DreamWeaver*
Using FileZilla:
1. Enter details as shown below and click "Quickconnect"
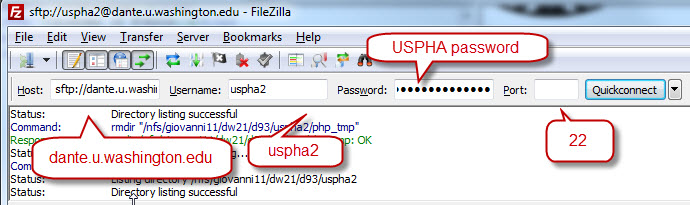
2. FileZilla then connects to the UW's FTP server
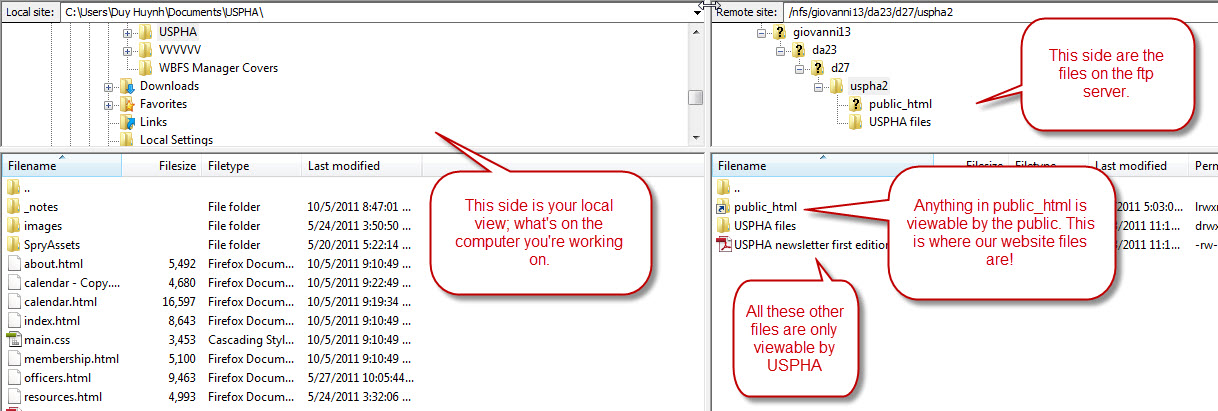
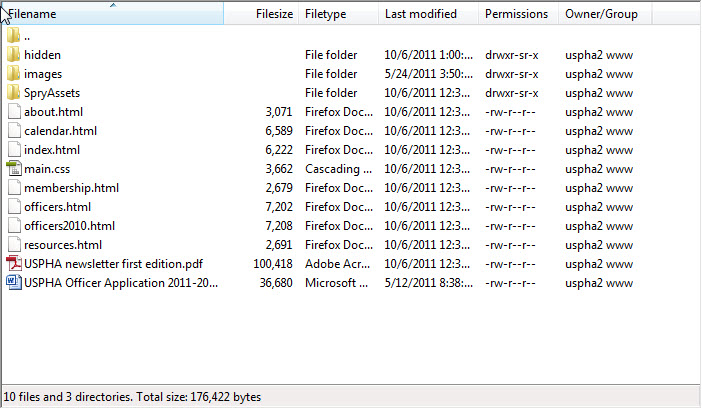
3. If you click on public_html, you will see all the files used for the website...
4. You can transfer files back and forth from the local window to remote window.
Back to ToC
2. Importing the website to your local computer
Now say you want to work on the website but you don't have the files on you. You can either use FileZilla to retrieve the entire contents of public_html or better yet, let DreamWeaver do it for you:
- Right-click and save: USPHA.ste.
- Open DreamWeaver
- Navigate to Site>Manage Site>Import>USPHA.ste (the file you just downloaded)
- Create and select a folder named 'USPHA' to save the files in
- Create and select a folder named 'images' to save images in
- Lower right-hand corner:
- Select as shown and click 'Preview...'
- Click 'OK', this downloads all the files from the server to your computer
- Now the files on the server are on your local computer
Back to ToC
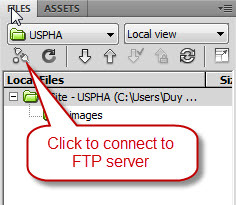
3. Syncing in DreamWeaver
Whenever you are working on the site in DreamWeaver, you will use the 'sync' feature often to ensure your local files and the server files are the same.
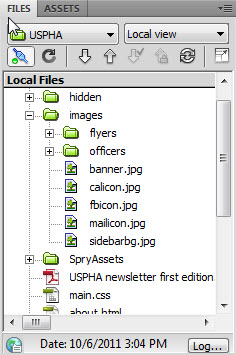
You will use the 'Files' panel to view the files in your website and to sync.
 Click this to connect to the remote server
 This means you are connected to the remote server
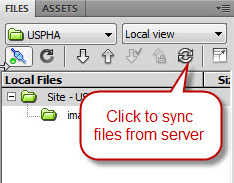
 This is to refresh the 'Files' panel, in case you added a file and don't see it right away
 This is the 'Synchronize with Remote Server' icon. Pressing it syncs your local site and remote site
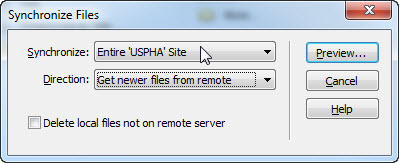
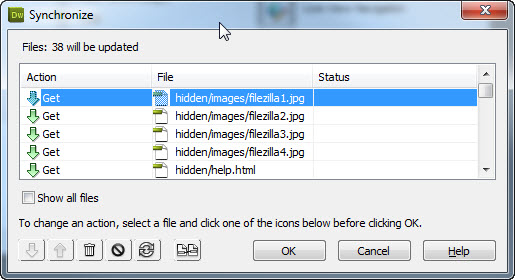
- You will see this pop up after pressing the 'sync' button
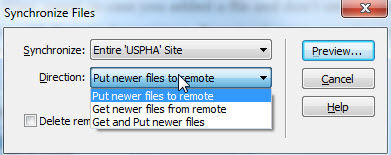
- You will commonly be syncing the 'Entire USPHA Site'
- 'Put' is to send files to server, 'Get' is to retrieve files from server
Back to ToC
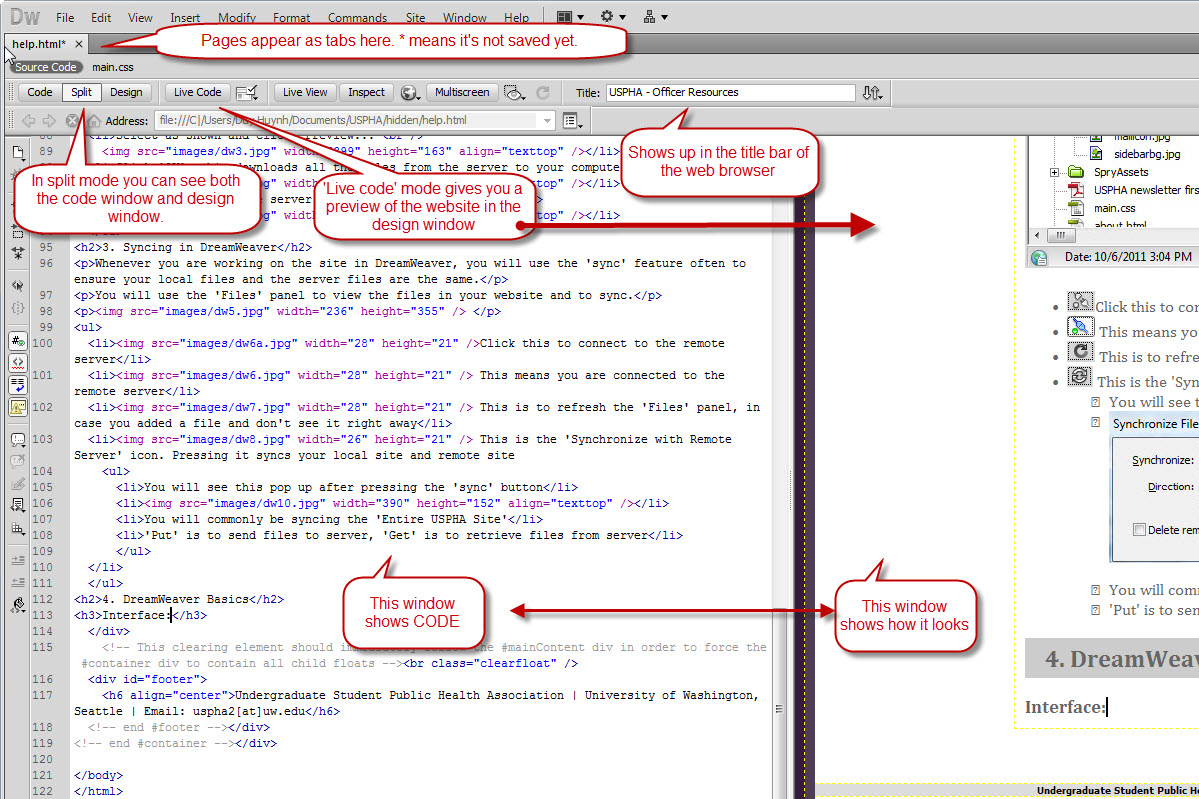
4. Dreamweaver Interface
Click to enlarge:
Back to ToC
5. Opening and editing webpages
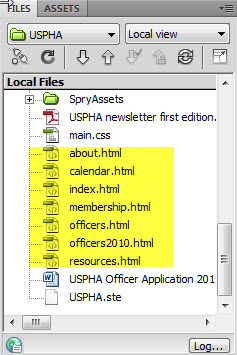
- Highlighted are the pages you will edit. Double-click on it to open it up in the code/design window.
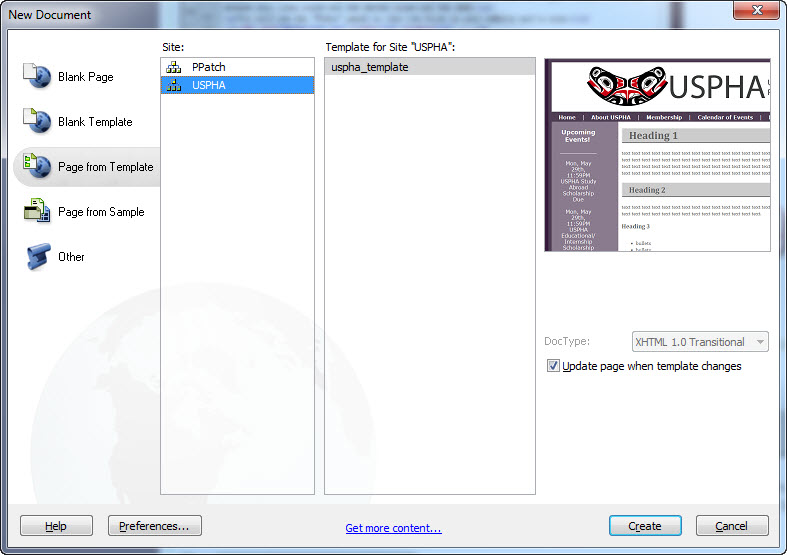
- To make a new page, 'ctrl+n'>Page from Template>Site:USPHA>uspha_template and check the box for 'Update page when template changes'
- Edit webpages as you would a word document in the design window. Simple!
- Don't worry about messing up the code, you're only able to edit the 'mainContent' region that's highlighted in teal.
- If you want to edit things outside of the 'mainContent' region, such as the navigation bar, banner or Upcoming Events column, you would have to edit the 'uspha_template.dwt' file. This file is where EVERYTHING is editable, so be cautious when you do so.
- Remember to use the 'Properties' panel for your formatting needs such as Headings, links, bullets, and numbered lists.
Back to ToC
6. Previewing website
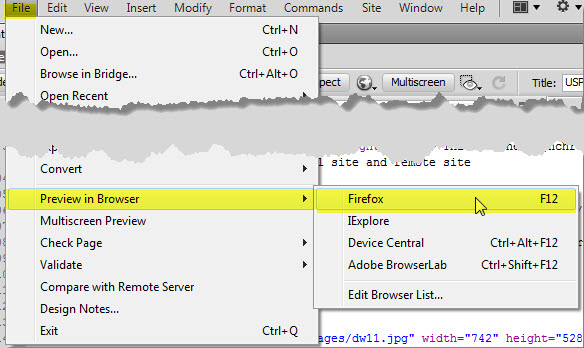
Save your work first then go to File>Preview in Browser>Firefox (or whatever browser). Or press 'F12'.
Back to ToC
7. Headings
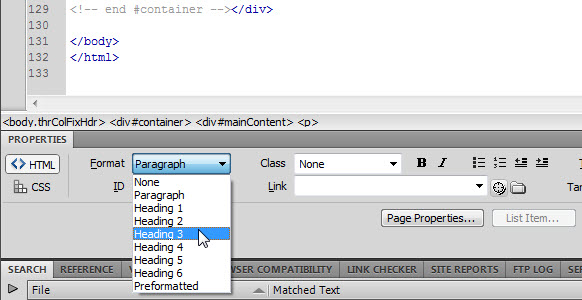
You will use different 'Headings' to differentiate sections of the webpage. Highlight the text you want to apply a heading to go in the 'Properties' panel, change it in the 'Format' dropdown menu:
-
Heading 1 - Used once at the top of pages
-
Heading 2 - Used for Sections
-
Heading 3 - Used for sub-sections
-
Heading 4 - Bolded paragraph text
- Paragraph Text
- Links
Back to ToC
8. Links
You can link to webpages within the site, to different parts of the same page, to webpages outside of the site, to documents, or to images. There are several ways to link things:
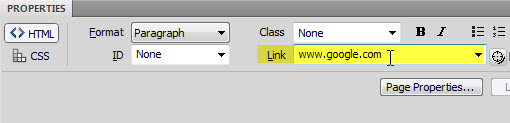
- Highlight text to be linked
- External address: In the 'properties' panel, type in the website address (eg; www.google.com)
- Different page within website: Click and drag
 to the page you want to link to:
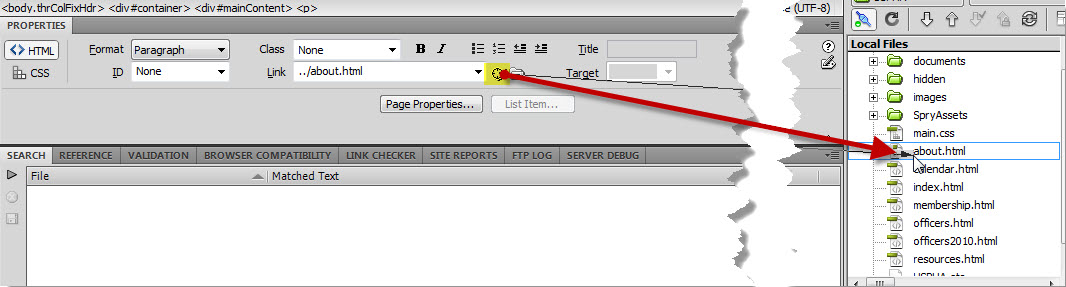
- Different part of same page link, like the Table of Contents of this page:
- Place cursor in front of the section you want to link TO
- Then in the 'Insert' panel (top-right of screen), under 'Common', click on

- Name your new Anchor
- Highlight text you want to link FROM, click-drag to the Anchor you created
- Linking images and documents as you would using
Back to ToC
9. Images + Documents
- Place all images in the USPHA\images folder and all documents such as flyers, newsletters in the USPHA\documents folder. OR you can drag-and-drop files into the 'Files' panel of Dreamweaver:
- To insert documents and images, just drag and drop them from the 'Files' panel to the design window
Back to ToC
10. Updating the 'Upcoming Events' column
You will be updating only the uspha_template.dwt template file. When you update that, it will change all the other pages as well.
- In the 'Files' panel in DreamWeaver, located and open 'uspha_template.dwt' in the folder 'Templates'.
- Make changes to the 'Upcoming Events' column and save your changes.
- DreamWeaver will ask if you want to update pages, accept and close the box you get.
Back to ToC
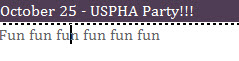
11. Updating the 'Calendar of Events' page
Underneath the Google Calendar on the Calendar of Events page, there are descriptions of events in detail in a cool looking accordian-style view.

To add another event description:
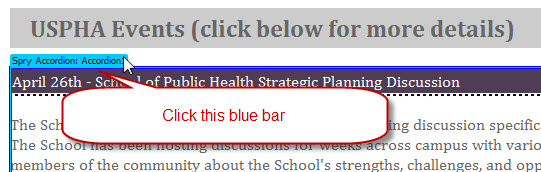
- In the 'properties panel', click the '+' to add another. The arrows to reorder.
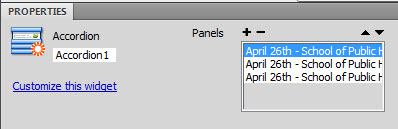
- Now you can edit the label and contents like normal.